Difference between revisions of "Audio"
OneArtPlease (talk | contribs) |
OneArtPlease (talk | contribs) (typo) |
||
| (6 intermediate revisions by the same user not shown) | |||
| Line 1: | Line 1: | ||
| + | [[Category:Development Topics]] | ||
| + | |||
| + | |||
=Parts to try= | =Parts to try= | ||
=Approved parts= | =Approved parts= | ||
| Line 29: | Line 32: | ||
Most USB audio hardware comes with a built in headphones jack or any other way of audio output. Once the device has been detected as described above you can connect your headphones. | Most USB audio hardware comes with a built in headphones jack or any other way of audio output. Once the device has been detected as described above you can connect your headphones. | ||
| + | |||
| + | Download [[Image:Tone.wav]] and transfer the wav file to the camera using FTP then execute in the directory where the file is uploaded to (/tmp might be a good place) | ||
| + | aplay tone.wav | ||
| + | |||
| + | With most audio devices you should hear the audio file play through the headphones without any further configurations. | ||
| + | |||
| + | ==Alsamixer== | ||
| + | [[Image:Xterm.jpeg|thumb|200px]] | ||
| + | |||
| + | Alsamixer is a graphical audio mixer that you be used with just the console. | ||
| + | |||
| + | ===Installation=== | ||
| + | Download: [[Image:Alsamixer.tgz]] | ||
| + | |||
| + | Download the tgz archive and transfer it to the camera with FTP to /tmp | ||
| + | Next, login via telnet/ssh/console to camera and execute: | ||
| + | |||
| + | cd / | ||
| + | tar -xzf /tmp/Alsamixer.tgz | ||
| + | |||
| + | ===Usage=== | ||
| + | For using alsamixer set terminal type after each relogin via console | ||
| + | |||
| + | for color output: | ||
| + | export TERM=xterm | ||
| + | alsamixer | ||
| + | |||
| + | for black/white output: | ||
| + | export TERM=vt220 | ||
| + | alsamixer | ||
| + | |||
| + | |||
| + | Once alsamixer is running you can use the arrow keys to navigate, turn volume up/down and use some F keys for switching between playback/recording and settings. | ||
| + | |||
| + | Elphel cameras also come with Jack preinstalled: [[JACK_in_Elphel_cameras]] | ||
Latest revision as of 02:07, 23 November 2010
Contents
[hide]Parts to try
Approved parts
THE T.BONE MICPLUG USB : http://www.thomann.de/gb/the_tbone_micplug_usb.htmThe T.Bone MicPlug USB - USB interface with mic preamp and internal A/D converter (16bit, 44.1/48kHz), internal 48V phantom power, headphone output, professional preamp with adjustable gain, USB powered, includes USB cable.
Audio USB interface (with XLR-mic pre amp)
Microphones
Software
Detect Devices
USB hardware is hot-plugable and should function just seconds after it was inserted.
To test whether a USB audio device was detected execute the following in the console:
aplay -l
you should get a list of connected the devices similar to this:
**** List of PLAYBACK Hardware Devices ****
card 0: default [USB  AUDIO  ], device 0: USB Audio [USB Audio]
 Subdevices: 1/1
 Subdevice #0: subdevice #0
Test Audio Playback
Most USB audio hardware comes with a built in headphones jack or any other way of audio output. Once the device has been detected as described above you can connect your headphones.
Download File:Tone.wav and transfer the wav file to the camera using FTP then execute in the directory where the file is uploaded to (/tmp might be a good place)
aplay tone.wav
With most audio devices you should hear the audio file play through the headphones without any further configurations.
Alsamixer
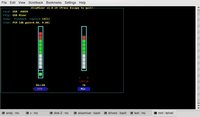
Alsamixer is a graphical audio mixer that you be used with just the console.
Installation
Download: File:Alsamixer.tgz
Download the tgz archive and transfer it to the camera with FTP to /tmp Next, login via telnet/ssh/console to camera and execute:
cd /
tar -xzf  /tmp/Alsamixer.tgz
Usage
For using alsamixer set terminal type after each relogin via console
for color output:
export TERM=xterm
alsamixer
for black/white output:
export TERM=vt220
alsamixer
Once alsamixer is running you can use the arrow keys to navigate, turn volume up/down and use some F keys for switching between playback/recording and settings.
Elphel cameras also come with Jack preinstalled: JACK_in_Elphel_cameras

