Difference between revisions of "Nc393-h"
From ElphelWiki
(→Body and lenses adjusting) |
|||
| Line 15: | Line 15: | ||
* Actual rotating - it is safe to rotate ±180° (for any allowed rotation on Fig.2). The cables inside the tubes are flat. | * Actual rotating - it is safe to rotate ±180° (for any allowed rotation on Fig.2). The cables inside the tubes are flat. | ||
| − | * Do not rotate the vertical tubes around the cross tube - | + | * Do not rotate the vertical tubes around the cross tube (actually rotating by ±5° is ok) - there are stoppers that prevent cutting off the cables inside. |
* To '''fixate a part around a tube''', <font color='red'>'''carefully'''</font> tighten the screws. If the part is plastic try to tighten them evenly with small steps. Start with the screws located in the middle of the part where it is stronger. When fixated there's approximately 1-1.5mm gap between the parts arms. | * To '''fixate a part around a tube''', <font color='red'>'''carefully'''</font> tighten the screws. If the part is plastic try to tighten them evenly with small steps. Start with the screws located in the middle of the part where it is stronger. When fixated there's approximately 1-1.5mm gap between the parts arms. | ||
Revision as of 12:33, 3 December 2018
Notes
Exterior
Body and lenses adjusting
- To rotate a part around a tube, release the screws. If the part is plastic, try to release them evenly with small steps. Start with the ones located close to the sides of the part, then do the middle ones.
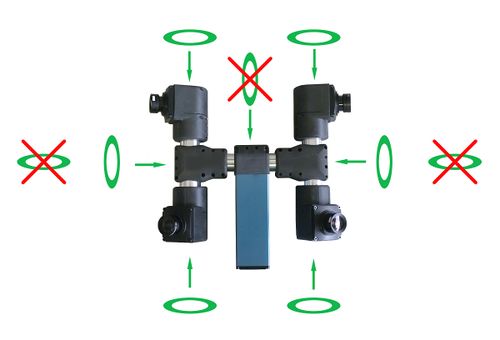
- Actual rotating - it is safe to rotate ±180° (for any allowed rotation on Fig.2). The cables inside the tubes are flat.
- Do not rotate the vertical tubes around the cross tube (actually rotating by ±5° is ok) - there are stoppers that prevent cutting off the cables inside.
- To fixate a part around a tube, carefully tighten the screws. If the part is plastic try to tighten them evenly with small steps. Start with the screws located in the middle of the part where it is stronger. When fixated there's approximately 1-1.5mm gap between the parts arms.
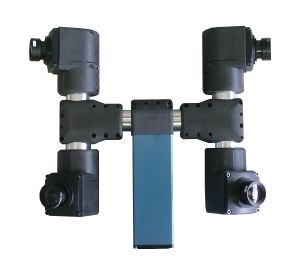
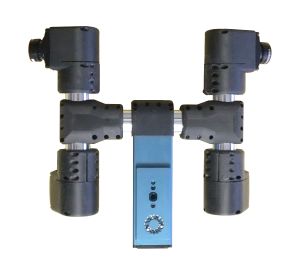
- By default the camera is mounted vertically (easier to ship in this configuration), see Fig.1b. To change to horizontal mount the vertical tubes, those with sensors on ends, (Fig.2) have to be rotated 90°. The body (the blue one) should not be rotated around the cross tube - there's a stopper inside, so the cables might not get cut off. After switching to horizontal mount - the sensors will be oriented upside down - they can be reattached but preferably change their vertical flips programatically (FLIPV) and store the settings.
- To rotate a sensor front end 180° = putting it upside down (This is discouraged in favor of setting everything from software - all settings can be stored/restored). Just remove all 4 screws holding it, then carefully pull it out from the plastic part, keeping in mind the cable - it's long enough but can be damaged. Rotate, then reinstall. Do not touch the screws that hold the plastic part and the tube.
- To detach the sensor from the camera - do the previous action and just disconnect the cable.
- To rotate the body 180° = upside down. Unscrew only the screws holding the body with the plastic part.
- To detach the body (system boards) from the camera - it's complicated - please contact support.


