Difference between revisions of "Eyesis gui"
From ElphelWiki
| Line 66: | Line 66: | ||
* By default the autoexposure mode is ON with a 1ms maximum exposure. To turn it off go to "Other Parameters" link & AUTOEXP_ON=0 | * By default the autoexposure mode is ON with a 1ms maximum exposure. To turn it off go to "Other Parameters" link & AUTOEXP_ON=0 | ||
=====Quality===== | =====Quality===== | ||
| + | * Set Coring Index (the higher index the less the image size and so the quality is worse - default - 5, normal is 5-20). | ||
| + | * Control the compression quality. | ||
=====Other===== | =====Other===== | ||
| − | + | * "Manually" Mount/Unmount drives. | |
| + | * ON/OFF color bars pattern. | ||
==<font color=blue><b>4. Status & Errors</b></font>== | ==<font color=blue><b>4. Status & Errors</b></font>== | ||
| Line 73: | Line 76: | ||
* "Camogm last error code" = 5 - a frame wasn't written on the HDD in time. Although the recording will not be stopped - it is better to stop/start it. | * "Camogm last error code" = 5 - a frame wasn't written on the HDD in time. Although the recording will not be stopped - it is better to stop/start it. | ||
* Check logs from time to time. | * Check logs from time to time. | ||
| − | * If a HDD is not detected you'll get <font color=red><b>HDD low space</b></font> error. | + | * If a HDD is not detected you'll get <font color=red><b>HDD low space</b></font> error. Then reattach the HDD and reboot the corresponding camera (see the '''Other''' paragraph of this page). |
| + | |||
| + | = Other = | ||
| + | * telnet 192.168.0.xx1 | ||
| + | * telnet 192.168.0.xx2 | ||
| + | * telnet 192.168.0.xx3 | ||
| + | * root/pass | ||
| + | * Soft reboot can be done in telnet session with a command "reboof -f" ''OR'' go to http://192.168.0.xxx -> Terminal and type the same there (the page will freeze in cause the camera will be rebooting) | ||
| + | |||
= Links = | = Links = | ||
Revision as of 14:03, 24 August 2010
Contents
About
Eyesis GUI allows to:
- change sensors' settings
- change compression quality
- start/stop recording
- check images and monitor sub-units status information
Download & Install
Ubuntu Linux
Package name: elphel-eyesis-gui
Dependencies: apache2, php5
There is a prebuilt package for Ubuntu users at elphel-eyesis-gui PPA.
To install it, use the following commands, see help for more information.
 sudo add-apt-repository ppa:andersonnotgood/elphel
 sudo apt-get update
 sudo apt-get install elphel-eyesis-gui
Other platforms
- Get the sources from http://elphel.cvs.sourceforge.net/viewvc/elphel/eyesis353/elphel-eyesis-gui/
- Copy to you web server folder the following files:
eyesis.html,
eyesis.js,
camogmgui_multiple.php
jquery-ui-1.8.4.custom.tar.gz
- Unpack the archive (should get "jquery-ui-1.8.4.custom/")
User Guide
1. GUI page
2. Quick Start
Note: There is a program called camogm for recording running on all 3 sub-cameras. Once the GUI page is accessed or refreshed a launch request is issued - it can take some time (~20-30sec).
- Set the IPs (correct ips are 192.168.0.xx1,192.168.0.xx2,192.168.0.xx3). Other parameters can be left default - access the GUI page. After camogms are started the "Camogm Status" will indicate that.
- Check the images
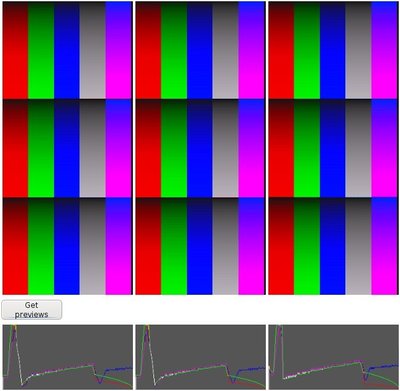
1. Go to the Other tab - switch on the Color bars pattern.
2. Press Get Previews button (it is ok if the images are cut from the bottom - it's the browser problem - just press the button again)
3. turn off the color pattern mode.
- Go to the Camera tab and press the Enable JP4 button.
- Make a test RECORD/STOP to check if all HDDs are present (the default RECORD delay is set to 5 seconds, so wait until camogm state becomes "running" then issue a STOP)
- RECORD
- Check camogm logs from time to time.
3. Tabs
Network
- Assign the correct IPs (currently works only in 192.168.0.x subnetwork + the correct IPs are 192.168.0.xx1,192.168.0.xx2, 192.168.0.xx3)
- Set refresh interval (status requests period) (can be left default)
Camogm
- HDDs are mounted with RECORD and unmounted with STOP.
- HDDs mount points are /var/0 - /var/7
- Prefix should be set to /var/0/ - /var/7/ (slash at the end is important). If the partition is less than 250GB an auto incrementing prefix change will be made.
- Split size, Split interval & Max frames - describe *.mov file. Whatever condition comes first it will result in a start of a new file.
Camera
- By default the autoexposure mode is ON with a 1ms maximum exposure. To turn it off go to "Other Parameters" link & AUTOEXP_ON=0
Quality
- Set Coring Index (the higher index the less the image size and so the quality is worse - default - 5, normal is 5-20).
- Control the compression quality.
Other
- "Manually" Mount/Unmount drives.
- ON/OFF color bars pattern.
4. Status & Errors
- Normally during the recording the buffers are not filled more than a half when the camogm state is "running". For "stopped" & "starting" the buffers can be filled arbitrarily.
- "Camogm last error code" = 5 - a frame wasn't written on the HDD in time. Although the recording will not be stopped - it is better to stop/start it.
- Check logs from time to time.
- If a HDD is not detected you'll get HDD low space error. Then reattach the HDD and reboot the corresponding camera (see the Other paragraph of this page).
Other
- telnet 192.168.0.xx1
- telnet 192.168.0.xx2
- telnet 192.168.0.xx3
- root/pass
- Soft reboot can be done in telnet session with a command "reboof -f" OR go to http://192.168.0.xxx -> Terminal and type the same there (the page will freeze in cause the camera will be rebooting)
