Difference between revisions of "Eyesis User Guide"
(→Eyesis PC) |
(→HDDs) |
||
| Line 18: | Line 18: | ||
192.168.0.223 | 192.168.0.223 | ||
| − | === | + | ===Data Storage=== |
| + | Eyesis Data Storage waterproof is a waterproof box, mounted at the bottom of the camera post. It contains 3 swappable 2.5″ Solid State hard drives 500 GB each, which is enough to record up to 12 hours of images taken at 5 fps (max frame rate) at full resolution. Each image is geotagged via external GPS unit attached through the sealed USB connector. It also contains power supply for camera, Gigabit Ethernet switch and USB connector (IP68) for the GPS receiver. Dimensions of the box are 280mm x 120mm x170mm [11" x 4.7" x 6.7"] | ||
| + | |||
{| | {| | ||
|[[File:Eyesis hdds.jpeg|thumb|400px|Fig.3 HDDs]] | |[[File:Eyesis hdds.jpeg|thumb|400px|Fig.3 HDDs]] | ||
|} | |} | ||
| − | + | Swappable SSDs are not hot-pluggable. If a SSD is reinserted or inserted when the power is on the corresponding module should be [http://wiki.elphel.com/index.php?title=Elphel_353_series_quick_start_guide#Reboot rebooted]. Each SSD is connected to a separate camera module. SSDs are already formatted to EXT2. | |
[http://wiki.elphel.com/index.php?title=HDD_Format Format HDD guide]. | [http://wiki.elphel.com/index.php?title=HDD_Format Format HDD guide]. | ||
Revision as of 11:30, 14 January 2011
Contents
Camera
Outside
Power 110V/220V AC
A custom cable is provided with a connector mating part on. Goes to a wall plug / a car power converter.
USB (for GPS receiver)
An external Garmin GPS 18x is provided. Connector's mating part is shipped - should be put on the receiver's end.
Ethernet (control)
The connector's mating part is shipped and should be put on a network cable that will go to a PC or laptop. Eyesis modules have default addresses:
192.168.0.221 (master, gps connected, once online syncs the other 2 modules)
192.168.0.222
192.168.0.223
Data Storage
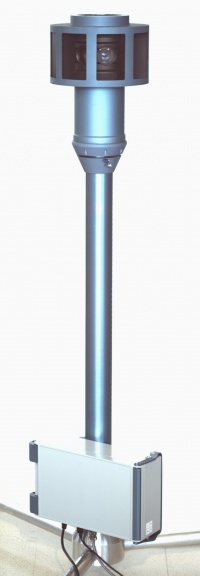
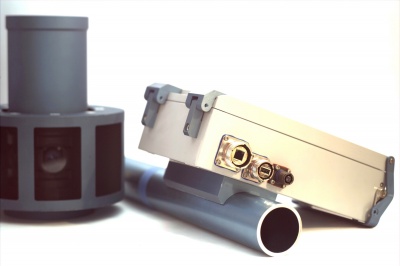
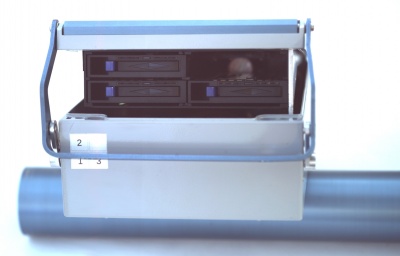
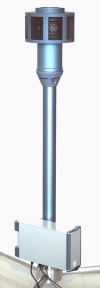
Eyesis Data Storage waterproof is a waterproof box, mounted at the bottom of the camera post. It contains 3 swappable 2.5″ Solid State hard drives 500 GB each, which is enough to record up to 12 hours of images taken at 5 fps (max frame rate) at full resolution. Each image is geotagged via external GPS unit attached through the sealed USB connector. It also contains power supply for camera, Gigabit Ethernet switch and USB connector (IP68) for the GPS receiver. Dimensions of the box are 280mm x 120mm x170mm [11" x 4.7" x 6.7"]
Swappable SSDs are not hot-pluggable. If a SSD is reinserted or inserted when the power is on the corresponding module should be rebooted. Each SSD is connected to a separate camera module. SSDs are already formatted to EXT2.
Inside
Eyesis camera consists of 3 individual modules. Each module records data from 3 sensors organizing it vertically in triplets. There is a master module (192.168.0.221) that has GPS reciever connected, syncs the timestamps and triggers the other 2 modules. More information here.
Operating
Output
- 3x HDDs, each containing *.mov files from 3x 3-sensor modules (a single HDD is connected to an individual camera module).
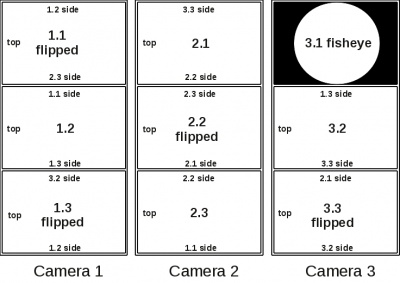
- Each frame in a *.mov file is a combination of frames from 3 sensors glued vertically - triplet.
- The modules are numbered - 1,2,3 - having individual ip addresses.
- The sub images are [1.1, 1.2, 1.3], [2.1, 2.2, 2.3], [3.1, 3.2, 3.3]. 3.1 is the fisheye image.
- Horizontal panorama sequence is the following: 1.1 - 1.2 - 1.3 - 3.2 - 3.3 - 2.1 - 2.2 - 2.3
- The frames in *.movs are indexed.
- A single image format is JP4 - a raw format with a higher quality and frame rate against JPEG.
- JP4 images can be converted to either TIFF or DNG format with Movie2DNG or ImageJ Elphel plugins.
- Corresponding frames have the same time stamps generated by the 1st module.
- The 1st module frames are geotagged.
Power ON
Attach the HDDs and the GPS receiver then power ON. The boot process takes ~40-60 sec. After that the camera modules can be accessed through the network either all through the Eyesis GUI or individual camera Web UI.
Default settings
- autoexposure is ON (parameter AUTOEXP_ON=1).
- maximum autoexposure upper limit parameter AUTOEXP_EXP_MAX=1000 (=1ms).
Note: the exposure outdoors at daytime is usually 0.1 ms, indoors under good light conditions - 15-20ms.
- 2.5 FPS - TRIG_PERIOD=38400000 (parameter is measured in 96MHz clock units)
- Compression Quality 95% (parameter QUALITY=95)
Note: The Maximum image size for correct operation is ~5.5MB (higher size causes camera's buffer overflow). Normally the image size is <4MB at Quality=95%
Tests
check images
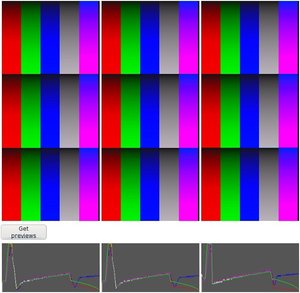
1. Go to the Other tab - switch on the Color bars pattern.
2. Press Get Previews button (it is ok if the images are cut from the bottom - it's the browser problem - just press the button again)
3. turn off the color pattern mode.
check HDDs
- When a HDD is attached correctly a blue led is on.
- Make a test RECORD/STOP to check if all HDDs are present (the default RECORD delay is set to 5 seconds, so wait until camogm state becomes "running" then issue a STOP)
Controls
Eyesis GUI
Controls recording, quality and some other settings. Displays recording, free space, file size status, also shows previews and histograms from all the modules. Should be pre-installed on the laptop - these are HTML pages, PHP scripts and JavaScript files.
http://127.0.0.1/eyesis.html
Single Module Web UI
Controls color, white balance, autoexposure, frame rate and all the other settings - the default Eyesis settings are for a sunny day. The changes are applied only to an individual module - need to be repeated for the other 2 Eyesis modules. The control laptop should have address from the same subnetwork - 192.168.0.xxx - then Eyesis modules can be accessed:
http://192.168.0.221 (master module, gps connection, once online syncs the other 2 modules)
http://192.168.0.222
http://192.168.0.223
Recording
Is controlled from http://127.0.0.1/eyesis.html
Recording Format
Combined tripple images in the JP4 format are stored in *.mov files. By default, a mov-file consists of 100x jp4 images.
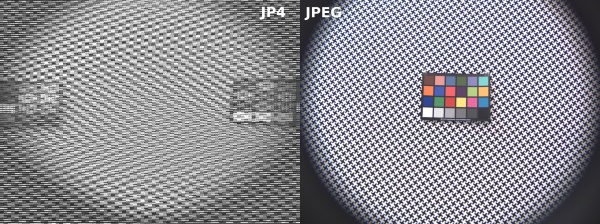
Note: On the previews (where viewed as a jpeg, before processing) JP4 looks gray colored, cubic - not really viewable. Before recording it is more convenient to use jpeg to adjust settings, then switch to JP4 format (A "force JP4 recording" checkbox enabled by default is added to elphel-eyesis-gui v0.5).
Start
RECORD-button - HDDs will be automatically mounted. If the elphel-eyesis-gui is >0.4 then there's a force_jp4_recording enabled by default.
Stop
STOP-button - HDDs will be automatically unmounted.
Power OFF
Once the camera is not recording and HDDs are unmounted it can be safely powered off.
Note: soft reboot is described here
Eyesis PC
Shuttle SX58J3 Intel Core i7; w/8 Core processor; used for image download, aberration correction and software updates.
Partitions
| partition; | size | description |
|---|---|---|
| / | 96GB | System |
| /data | 1.7TB | Store data |
Software
- Elphel SDK (+ ImageJ) - ImageJ for process JP4s - TIFF/JPEG output
- Movie2DNG - extract JP4/DNG images from *.MOVs
- Ufraw - view/process DNG/TIFF
- Dcraw
- Hugin tools - stitching
- elphel-eyesis-gui - camera GUI
Pictures
|
|
|
