Eyesis gui
From ElphelWiki
Contents
About
|
Eyesis GUI allows to:
|
Download & Install
Ubuntu Linux
Package name: elphel-eyesis-gui
Dependencies: apache2, php5
There is a prebuilt package for Ubuntu users at elphel-eyesis-gui PPA.
To install it, use the following commands, see help for more information.
 sudo add-apt-repository ppa:andersonnotgood/elphel
 sudo apt-get update
 sudo apt-get install elphel-eyesis-gui
Other platforms
- Get the sources from http://elphel.cvs.sourceforge.net/viewvc/elphel/eyesis353/elphel-eyesis-gui/
- Copy to you web server folder the following files:
eyesis.html,
eyesis.js,
camogmgui_multiple.php
jquery-ui-1.8.10.custom.tar.gz
- Unpack the archive (should get "jquery-ui-1.8.10.custom/")
User Guide
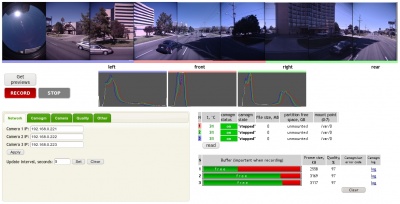
1. GUI page
2. Quick Start
Note: There is a program called camogm for recording should be launched on all 3 sub-cameras. Once the GUI page is accessed or refreshed a launch request is issued - it can take some time (~20-30sec).
- Set the IPs (correct ips are 192.168.0.xx1,192.168.0.xx2,192.168.0.xx3). Other parameters can be left default. After camogms are started the "Camogm Status" will indicate that with a status "ON"
- Check the images
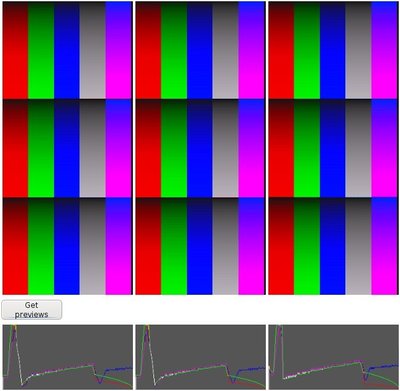
1. Go to the Other tab - switch on the Color bars pattern.
2. Press Get Previews button (it is ok if the images are cut from the bottom - it's the browser problem - just press the button again)
3. turn off the color pattern mode.
- Go to the Camera tab and press the Enable JP4 button (no need after v0.5).
- Make a test RECORD/STOP to check if all HDDs are present (the default RECORD delay is set to 5 seconds, so wait until camogm state becomes "running" then issue a STOP)
- RECORD
- Check camogm logs from time to time.
3. Tabs
Network
- Assign the correct IPs (currently works only in 192.168.0.x subnetwork + the correct IPs are 192.168.0.xx1,192.168.0.xx2, 192.168.0.xx3)
- Set refresh interval (status requests period) (can be left default)
Camogm
- HDDs are mounted with RECORD and unmounted with STOP.
- Important: always stop recording before powering the cameras down so the file systems are unmounted correctly.
- HDDs mount points are /var/0 - /var/7 (there is only one partition on an 250GB SSD HDD)
- Prefix should be set to /var/0/ - /var/7/ (slash at the end is important). If the partition is less than 250MB an auto incrementing prefix change will be made.
- Split size, Split interval & Max frames - describe *.mov file split conditions. Whatever condition comes first it will result in a start of a new file.
- Debug is always enabled. The Default Level is 0 - can be changed by apply - Level 3 is detailed enough.
- REC delay - requires apply. Sets the delay of the recording start after clicking the RECORD button.
Camera
- By default the autoexposure mode is ON with a 1ms maximum exposure. To turn it off go to "Other Parameters" link & AUTOEXP_ON=0
Quality
- Set Coring Index (the higher index the less the image size and so the quality is worse - default - 5, normal is 5-20).
- Control the compression quality.
Other
- "Manually" Mount/Unmount drives.
- ON/OFF color bars pattern.
4. Status & Errors
- Normally during the recording the buffers are not filled more than a half when the camogm state is "running". For "stopped" & "starting" the buffers can be filled arbitrarily.
- "Camogm last error code" = 5 - a frame wasn't written on the HDD in time. Although the recording will not be stopped - it is better to stop/start it so files on all cameras will start from the same timestamp.
- Check logs from time to time.
- If a HDD is not detected you'll get HDD low space error. Reattach the HDD and reboot the corresponding camera (see the Other paragraph of this page). After the reboot refresh the GUI page to launch the camogm program on the camera. If the "master" camera (having the lowest IP) is rebooted you'll need to reboot other 2 cameras also, their frame numbers are synchronized to master at boot time. Alternatively you may issue "/usr/html/autocampars --init" command trough telnet session on these 2 other cameras.
Other
- telnet 192.168.0.xx1
- telnet 192.168.0.xx2
- telnet 192.168.0.xx3
- root/pass
- Soft reboot can be done in telnet session with a command "reboof -f" OR go to http://192.168.0.xxx -> Terminal and type the same there (the page will freeze because the camera will be rebooting)
ChangeLogs
elphel-eyesis-gui (0.9) maverick; urgency=low
+ white balance
elphel-eyesis-gui (0.8) maverick; urgency=low
+ trig period change
elphel-eyesis-gui (0.7) maverick; urgency=low
+ tabs table formatting changed to div
elphel-eyesis-gui (0.6) maverick; urgency=low
 * added styles file eyesis.css
 * changed jqueryui package to 1.8.6
elphel-eyesis-gui (0.5) lucid; urgency=low
 + force JP4 recording
 + Autoexposure on/off
 + Set auto exposure maximum value
elphel-eyesis-gui (0.4) lucid; urgency=low
+ images are refreshed when color mode is changed or test mode turned on/off
elphel-eyesis-gui (0.3) lucid; urgency=low
+ autolaunch option

