Eyesis workflow
From ElphelWiki
Contents
[hide]Preface
The following page describes the Eyesis camera post-processing procedures.
Eyesis Output
- 3x HDDs, each containing *.mov files from 3x 3-sensor modules (a single HDD is connected to an individual camera module).
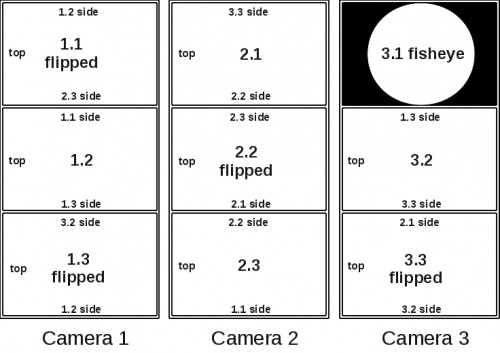
- Each frame in a *.mov file is a combination of frames from 3 sensors glued vertically - triplet.
- The modules are numbered - 1,2,3 - having individual ip address:
192.168.0.221
192.168.0.222
192.168.0.223
- The sub images are [1.1, 1.2, 1.3], [2.1, 2.2, 2.3], [3.1, 3.2, 3.3]. 3.1 is the fisheye image.
- The frames in *.movs are indexed.
- A single image format is JP4 (a raw format with a higher quality and frame rate against *.jpeg).
- Corresponding frames have the same time stamps generated by the 1st camera.
- The 1st camera frames are geotagged.
Post-Processing Setup
- HDDs are put into a processing PC and the data is copied.
Workflow
1. Processing panorama possible solutions
Stitching scripts samples.
- JP4 images can be extracted and converted to DNGs from *.MOVs by the program movie2dng.
- Dcraw and the Hugin tools can be used for stitching (a template *.pto for it should be created once).
