Difference between revisions of "Oscit on elphel"
(→Preparing sources) |
(→Installing tools & sources) |
||
| (4 intermediate revisions by one other user not shown) | |||
| Line 9: | Line 9: | ||
My laptop ip: | My laptop ip: | ||
| − | IP: '''192.168.0.10''' | + | IP: '''192.168.0.10''' |
mask: 255.255.0.0 | mask: 255.255.0.0 | ||
| Line 17: | Line 17: | ||
If you are like me and changed the IP of the camera but forgot the value, you can use an ip scan tool like [http://www.angryziber.com/ Angry IP scanner]. | If you are like me and changed the IP of the camera but forgot the value, you can use an ip scan tool like [http://www.angryziber.com/ Angry IP scanner]. | ||
| − | == | + | Once you can connect to the camera using it's default IP, you might want to change it (from the web browser). My network is based on 10.0.0.x addresses, so I changed the camera's IP to |
| + | |||
| + | IP: '''10.0.0.99''' | ||
| + | mask: 255.255.255.0 | ||
| + | |||
| + | The IP of the virtual machine (bridged) running Ubuntu is: | ||
| + | |||
| + | IP: 10.0.0.41 | ||
| + | |||
| + | == Installing tools & sources == | ||
I created a VM machine that runs Ubuntu and followed the steps described in the article [[Elphel Software Kit for Ubuntu]]. What I did: | I created a VM machine that runs Ubuntu and followed the steps described in the article [[Elphel Software Kit for Ubuntu]]. What I did: | ||
| Line 24: | Line 33: | ||
2. installed the minimal set of packages | 2. installed the minimal set of packages | ||
3. installed Cris-GCC | 3. installed Cris-GCC | ||
| − | 3.1 | + | 3.1 could not install using the sources |
| − | + | 3.2 installed using binary distribution: [ftp://ftp.axis.com/ftp/pub/axis/tools/cris/compiler-kit/old/cris-dist_1.64-1_i386.deb cris-dist_1.64-1_i386.deb]. | |
4. configure nfs. /etc/exports content: | 4. configure nfs. /etc/exports content: | ||
/nfs 192.168.0.0/255.255.0.0(rw,sync,no_root_squash) | /nfs 192.168.0.0/255.255.0.0(rw,sync,no_root_squash) | ||
/nfs 10.0.0.0/255.255.0.0(rw,sync,no_root_squash) | /nfs 10.0.0.0/255.255.0.0(rw,sync,no_root_squash) | ||
| − | + | 5. installed sources for elphel cameras in ~/git/elphel | |
Latest revision as of 15:24, 20 May 2009
Network setup
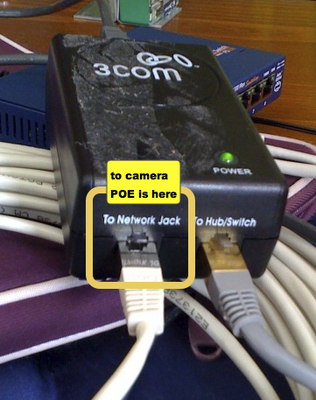
The first step is to plug the camera on the network and make sure it is powered and has a decent IP.
The easiest way to get started is to connect the computer to the camera (without passing by any switch or router) so that you can manually set your IP to match the camera's default:
My laptop ip:
IP:   192.168.0.10
mask: 255.255.0.0
Camera default ip:
192.168.0.9
If you are like me and changed the IP of the camera but forgot the value, you can use an ip scan tool like Angry IP scanner.
Once you can connect to the camera using it's default IP, you might want to change it (from the web browser). My network is based on 10.0.0.x addresses, so I changed the camera's IP to
IP:   10.0.0.99
mask: 255.255.255.0
The IP of the virtual machine (bridged) running Ubuntu is:
IP: 10.0.0.41
Installing tools & sources
I created a VM machine that runs Ubuntu and followed the steps described in the article Elphel Software Kit for Ubuntu. What I did:
1. I set my sources list to multiverse
2. installed the minimal set of packages
3. installed Cris-GCC
3.1 could not install using the sources
3.2 installed using binary distribution: cris-dist_1.64-1_i386.deb.
4. configure nfs. /etc/exports content:
 /nfs  192.168.0.0/255.255.0.0(rw,sync,no_root_squash)
 /nfs  10.0.0.0/255.255.0.0(rw,sync,no_root_squash)
5. installed sources for elphel cameras in ~/git/elphel
