Eyesis4Pi Footage Procedures page
From ElphelWiki
Contents
Procedures
- This will work if dealing with few panoramas. For many the best option is to use scripts w/o ui.
- Copying images before processing.
- Extracting GPS coordinates from the images' EXIF headers.
- Stitching the panorama sets processed in ImageJ into equirectangular projection format.
- Formatting/resizing the results.
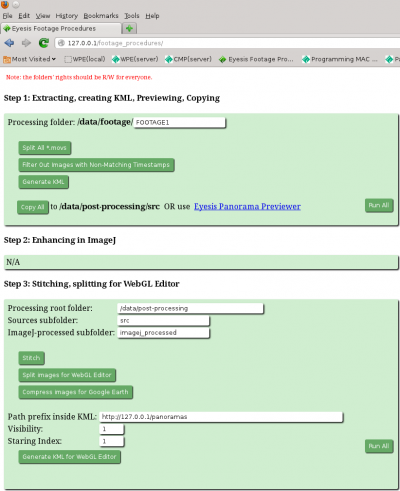
WebGUI screenshot
Note: ImageJ is not included into the WebGUI at the moment because it's not yet modified for launching from a browser.
System requirements
- Linux OS (Kubuntu preferably).
- Apache2 web server.
- PHP
- ImageMagick - convert.
- Movie2dng
- Hugin tools - enblend.
Download
Available for direct downloading from the SourceForge.net or from a terminal window provided the GIT is installed:
git clone git://git.code.sf.net/p/elphel/footage_procedures
Installation
- Download the source files.
- Install the required software.
- Create a link from the web server root path to the source folder. Terminal window example:
sudo ln -sf /<PATH_TO_FOOTAGE_PROCEDURES>/footage_procedures /<WEB_SERVER_ROOT_DIR>/footage_procedures
- It is assumed that the footage series are located at:
/data/footage/FOOTAGE1
/data/footage/FOOTAGE2
...
Working
Step 1
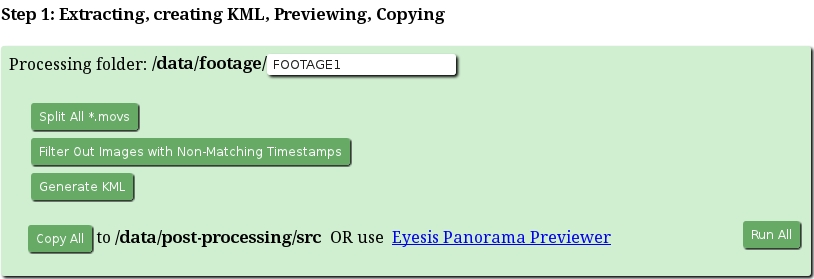
- Processing folder-input
A folder at "/data/footage" with the acquired images in the indexed subfolders.
- Split All *.movs-button (If equipped with internal SSDs)
Splits all *.mov files in /data/footage/FOOTAGE1/mov/N/, where directory N contains *.movs  from the N-th camera starting from 1 ->
N=1..9 for Eyesis4Pi-26 model. The results are placed into /data/footage/FOOTAGE1/0 as if the footage was recorded onto PC.
- Filter Out Images with Non-Matching Timestamps-button
Filters out uncomplete panoramas (missing files).
- Generate KML-button
Creates a KML file (map_points.kml in the /data/footage/FOOTAGE1) for the Eyesis Panorama Previewer.
Note: /data/footage/FOOTAGE1 directory should have r/w rights for the map could be saved in there.
- Copy All-button
Copies all the images into the specified directory for further processing in ImageJ. The source images can be selected for processing right at
their own directory w/o copiying.
Alternatively to Copy All allows to preview and copy selected panoramas for processing
Step 2
- N/A means only that it's not available in the WebGUI
- Please read an article about Post-Processing in ImageJ.
Step 3
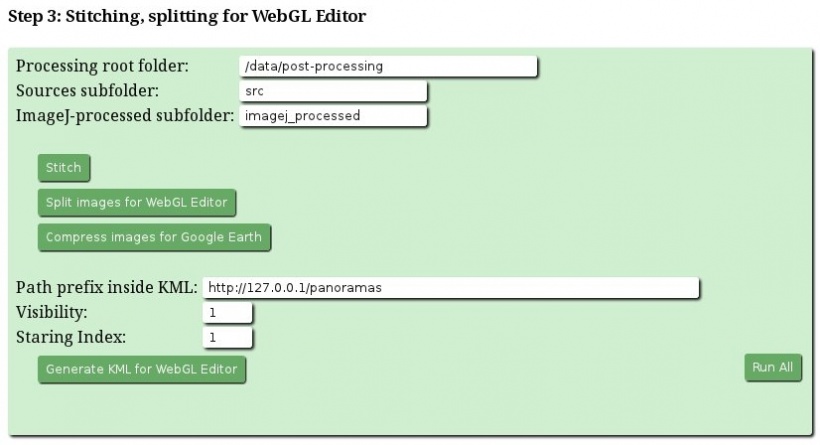
- Processing root folder-input
A root folder for post-processing - absolute path
- Sources subfolder-input
A folder with the JP4 source images in the Processing root folder - the sources are used for GPS data extraction.
- ImageJ-processed subfolder-input
A folder with the ImageJ plugin post-processing results to be stitched.
- Stitch-button (~3min/set)
Launches "enblend" from a stitch.php script for all panoramas in ImageJ-processed subfolder:
 enblend -l 10 --no-optimize --fine-mask -a -v -w -o result.tif 1334546768_780764-*_EQR.tiff 1334546768_780764-*_EQR-*.tiff
- Split images for WebGL Editor (<1min/set)
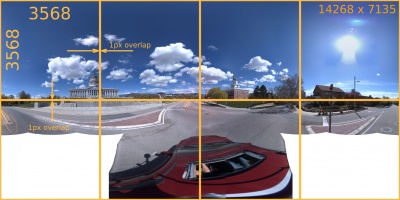
Cuts stitched panoramas into 8 pieces for the WebGL Editor.
- Compress images for Google Earth-button (~5sec/set)
Creates rescaled low resolution panoramas - so the KML file could be opened from Google Earth.
- Generate KML for the WebGL Editor-button (quick)
Scans all the source images in the Sources subfolder and creates a KML file with the GPS data. The file is saved into the Processing root folder
- Path prefix inside KML-input
Adds this prefix to the file name to make the final http link.
Note: "published" images should be accessible at this path (locally /<web_server_root>/panoramas/ = /<webgl-editor-path>/images/)
- Visibility-input
Tag inside the KML telling the Editor whether to show the panorama as a camera model ("1") or not ("0"). Use "1".
- Starting Index-input
KML records names.
- After images are split and KML is generated the results will be in the Processing root folder ready to be copied to the WebGL editor.
1. map.kml -> /<webgl_editor_path>/kml_files/
2. Splitted images -> /<webgl_editor_path>/images/
3. In the browser go to <webgl_editor_web_path>/pano_index.html
4. Don't forget to set up the database for the WebGL Editor - guide.
Links
- Eyesis4Pi Main Article
- Workflow
- User Guide - Recording
- User Guide - Post-Processing: Footage Procedures
- User Guide - Post-processing: ImageJ
- Data Structure Description
- Calibration Process


