Using the cameras
Contents
Introduction
Elphel network cameras — complex devices by which development the advanced technologies and non-standard program decisions are used. We constantly improve our products that users could to use the cameras with the least expenses of time and forces. In this section of Elphel Network Cameras Manual you can find out the detailed information about using the Elphel cameras.
Complete set
The camera complete set of delivery includes actually the network camera Elphel-313/323/333 and Live-CD or Live-DVD with special edition of the Debian-based GNU/Linux operational system Knoppix completed with the camera's necessary software.
Also the complete set of delivery can include lenses, an external power unit and connection cables for an additional payment.
Appearance
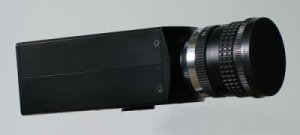 The Elphel-313/333 camera's box is folding and made of anodized aluminium. Overall dimensions 116х45х45 mm, weight approximately 150 g (without lens).
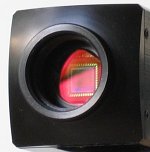 On the front side of the camera's box the carving socket for standard C/CS-mount lenses is located.
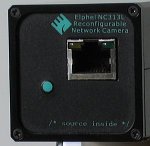 On the back side of the camera's box are located a socket for connection of a network cable, the switch-on push button for the software reloading mode and camera's model number mark. We constantly improve the products, therefore amount and appearance of the elements placed on the back panel, can change.
On the bottom side of the camera's box the standard carving socket for installation of the camera on a support is located.
Connection
Main Control Page
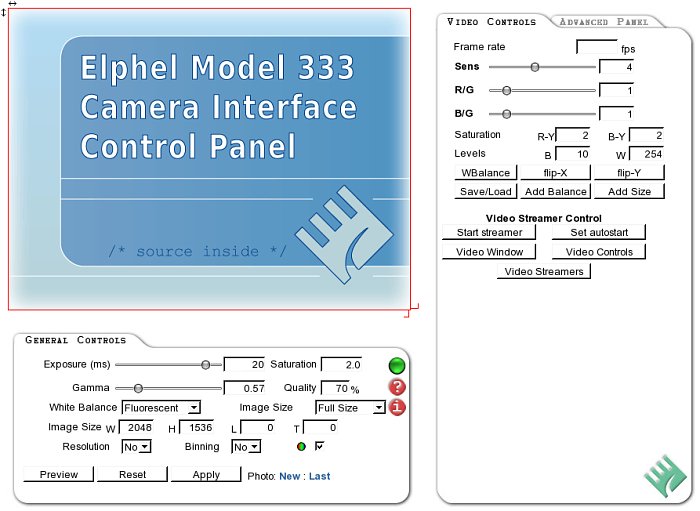
The Main Control Page uses javaScript to process user input (input fields and window of interest that can be selected by dragging a frame with the mouse), combines all camera acquisition parameters in a single GET request to a CGI program in the camera through the embedded web server (Boa). Currently camera does not support simultaneous access as each request actually controls the camera operation mode (including sensor resolution and frame rate) and not just connects to the camera output.
Page layout
On the top part of the page you should see preview image. It is always 640x512, 800x600 or 512x386 pixels (1/2 or 1/4 of camera resolution depending on the sensor) and does not change with the selected decimation and window of interest (red rectangle over the image).
Below the preview image there are camera controls:
General Controls
In Window section there are 2 buttons at the low-right corner of window. You may specify window of interest (WOI) by dragging this buttons with the mouse. You may also change it numerically by entering data to W(idth), H(eight), L(eft) and T(op) input fields below. That numbers are rounded according to the selected sensor decimation and to use integer multiple of 16x16 pixels MCUs in JPEG compression.
In Exposure field there is an input field to specify frame exposure time (in ms) - it is possible to specify fractions. You may change this parameter by dragging the slider with the mouse.
Saturation section allows adjusting contrast saturation.
Gamma field controls contrast by adjusting intensity conversion, gamma=1.0 corresponds to linear response (high contrast). Values less than 1 increase input dynamic range by expanding low intensity values (low contrast). You may change this parameter by dragging the slider with the mouse.
JPEG Quality sets standard JPEG compression quality. The higher the quality the bigger is the result file. It does not change the camera frame rate.
White balance section is the drop-down menu containing four static parameters: Sunlight, Cloudy, Incandenscent and Fluorescent. You can choose one of these parameters for achievement of the most qualitative image depending on conditions of illumination.
In Image size drop-down menu you may choose the few static windows size.
In Resolution section there are radiobuttons to select sensor decimation (resolution). Selecting 1 uses all pixels in WOI, 1/2 - each other (in both directions) - 1/4 total, 1/4 - 1 in 4 in each direction - 1/16 total and so on. Both WOI and decimation control actual sensor operation that runs at 20 MHz pixel clock, so the smaller the total number of pixels the higher is the frame rate (it is actually slower as the sensor has some "margins" around the active area).
![]() In monochrome mode (when Color radiobutton is not checked) "R" gain settings are used for all channels and color conversion is disabled.
In monochrome mode (when Color radiobutton is not checked) "R" gain settings are used for all channels and color conversion is disabled.
Below are 3 buttons Preview, Reset and Apply. Preview button refreshes the image in the top portion on a page (ignoring selected WOI and decimation), Reset button returns the initial adjustment parameters. The Apply button allow to accept the new changes.
Also there are two links after Photo: New contains a link to a camera CGI program that has all acquisition parameters attached. You may just click it to open the image in a new window or right-click it and select "Save link target as..." (or equivalent) to save the image on your computer. The second link Last points to last image already in the camera memory, you may use it to save already aquired image to your hard drive.
![]() button opens information window where is a list of the acquisition parameters used during the last image/clip acquisition.
button opens information window where is a list of the acquisition parameters used during the last image/clip acquisition.
Video Controls
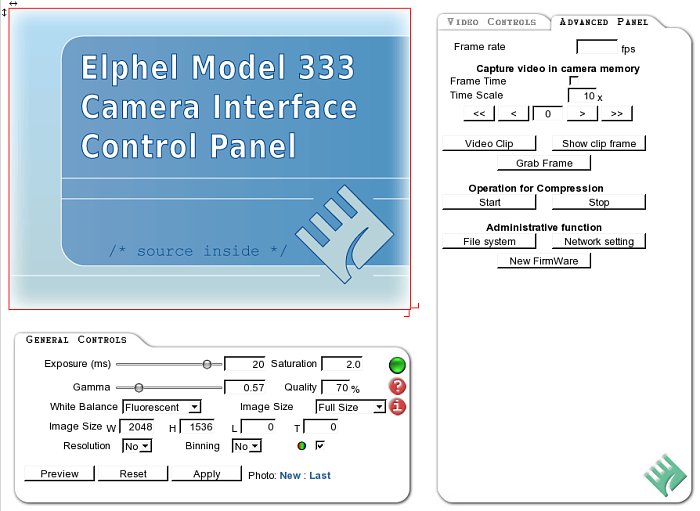
Video Controls in this section allow users to record a video clip in the camera memory and send it over the LAN/Internet as Quicktime video file. All settings for the image size, resolution, compression quality, analog gains and exposure are the same as for a still images described above, and that link adds extra parameters - Frame Rate and Time Scale. The first of them set desired frame rate (leave blank or set to 0 for the maximal rate), the secon field sets how much the playback time is longer than the acquisition one. I.e. setting of "10" makes the clip play 10 times slower that it was shot.
Total size of the clip (6-7MB) is determined my a camera internal buffer used for compressed images storage and the total number of frames as the frame headers are attached during the clip output and are not stored in the buffer. There are 2 ways to shoot a clip (usual duration 3-5 sec, depending on compression quality). First is to press Start stream button, wait for the event to occur and then press Acquire. In this mode after Start stream the camera continuously writes to the buffer, overwriting footage when all the available space is used. Pressing Stop stream button ends data saving and so the buffer contains the last data recorded. Other way - is to press Acquire before the event. In that mode the clip recording starts after the trigger and stops when the whole buffer is full.
There are additional controls to preview videoclip from the camera memory. Frame number 1 is the first one, 2 - second, etc. Frame number 0 is the last one in the clip, -1 - previous before last, etc. Any image acquisition (including Preview) erases the stored clip and makes it one frame long.
Clicking on the Video Clip link opens the clip in the Apple QuickTime ™ (or compartible) player plugin (if installed), you may also use this link to save the clip as a file in your computer.
Advanced Panel
Advanced Panel tab opens additional adjustment parameters of the image. In this section you may specify the more exact adjustments of color levels of the image.
Gains section control the sensor analog gain settings. R, G and B input fields control color components gains. Using high gain settings increases sensor noise but is required to view fast events with 1ms exposure time with the lightning used in the current setup.
R-Y specifies color saturation for red color component.
B-Y specifies color saturation for blue color component.
B specifies color saturation for blue color component.
W specifies level saturation for white color component.
The Flip-X button allows to turn the image horizontally.
The Flip-Y button allows to turn the image vertically.
NOTE: Some parameters (i.e. window size) cannot be changed without stopping the acquisition/compression.
Free Software and Open Hardware. Elphel, Inc., 2005
