Eyesis4Pi 393 User Guide - Recording
From ElphelWiki
Contents
Download & Install GUI
Install GUI to the device that will be used for recording. There are several ways to install it:
Terminal:
cd <any-path>
git clone https://git.elphel.com/Elphel/eyesis4pi-393-gui.git
git pull (repeat any time to get the latest)
Follow the instructions in INSTALL.txt:
1. (For Kubuntu 16.04) Install the following packages, terminal:
 sudo apt-get install apache2 php5.6 php5.6-curl

2. Make the src folder visible to the web server:
2a. Create a link, terminal: "sudo ln -sf <path-to-eyesis4pi_gui-folder> /var/www/html/eyesisgui"
2b. Or copy all the files to /var/www/eyesisgui.
Note: /var/www/html is apache2 document root folder.

(for recording over network only to host device)
2c. Make the footage root folder "/data/footage" writable for everyone.

3. Make editable eyesis4pi-393-gui/settings.xml for the webserver
   $ chmod 777 settings.xml
   This file restores the settings from previous session.
Dependencies
- php5.6-xml
~$ sudo apt install php5.6-xml
~$ sudo service restart apache2
Equipment/Package
- Eyesis4Pi 393
- External SSD enclosure
- Switch
- PC / Laptop
Power On
- Connect all cables - power, network, eSATA.
- Power on: switch, SSD enclosure, Eyesis4Pi393. Boot takes about 1 min.
- Setup PC IP (can be done beforehand, see Network Setup below)
- Refresh GUI after camera boots
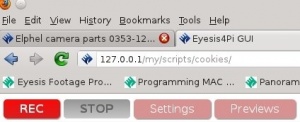
http://127.0.0.1/eyesisgui
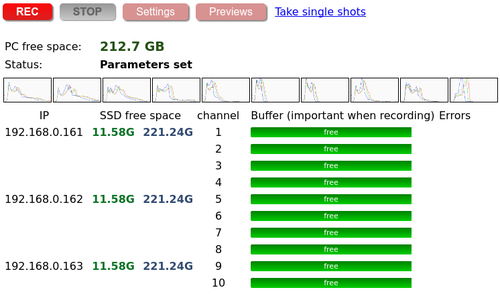
Note: If GUI is refreshed before subcamera has mounted SSD it will not display SSD free space. Refresh in a few moments or until SSD gets mounted.
Note: Each subcamera's drive has 2 partitions:
      * /dev/sda1 - ext4 file system - used by the logger on the 1st subcamera (192.168.0.161), and stored write info of the second partition
      * /dev/sda2 - no file system - images are written to the 'raw' partition for better speed. They are extracted later, using dd mostly
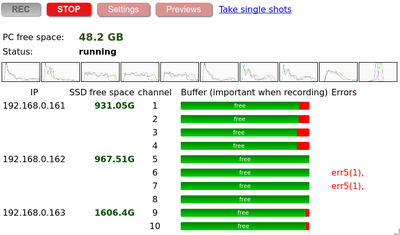
      In the GUI under SSD free space:
          * the 1st number - /dev/sda1
          * the 2nd number - /dev/sda2
Important Note: Use a fan to cool the camera's pole when shooting indoors.
Network Setup
- Connect the PC to the Gigabit port of the switch.
- Configure the PC's network settings:
IP address: 192.168.0.68 (example)
Mask:       255.255.255.0
Note: Eyesis4Pi 393 default IP addresses are 192.168.0.161-163
Tests
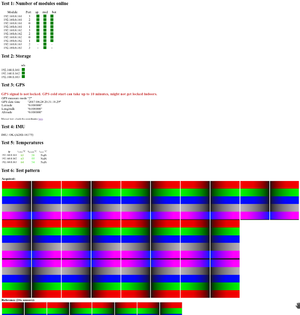
- http://127.0.0.1/eyesis4pi_gui_393/ > Test-tab > Run System Tests button
Setting recording parameters: camera settings
Description
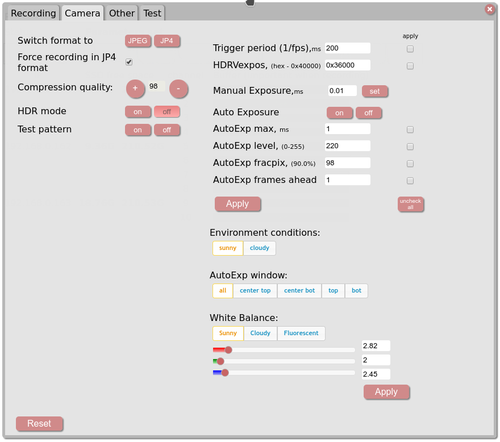
- Settings -> Camera-tab
Trigger period,ms  - 1/FPS, 250 = 4fps, 500 = 2fps, 1000 = 1fps...
HDRVexpos - not used.
Manual Exposure - used when auto exposure is off.
AutoExp max, ms - the autoexposure value limit.
AutoExp level - value of a pixel at which the autoexposure works.
AutoExp fracpix - number of pixels below the Autoexp level.
AutoExp frame ahead - number of previous frames used for calculatin the current frame exposure.
HDR mode - not used
Compression quality - JP4/JPEG compression quality.
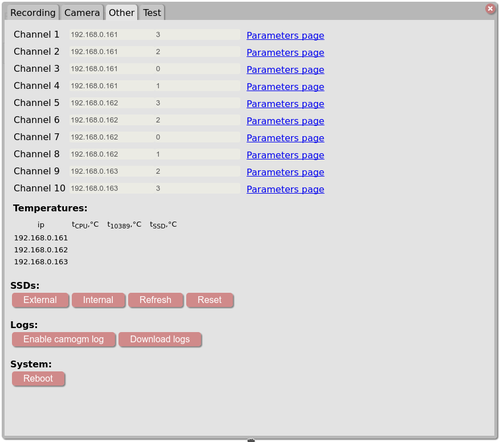
- Settings -> Other-tab
Displays temperatures
External - switch to external SSD (wait ~30s then click Refresh button and refresh the whole page - note the free space data)
Internal - switch to internal SSD (wait ~30s then click Refresh button and refresh the whole page - note the free space data)
Refresh - refreshes the recorder program write pointer (raw partition) - is needed mostly if the GUI was loaded before SSD was detected.
Reset - the system stores write pointer on an SSD, reset sets the write pointer back to the beginning of the raw partiiton
Reboot - system reboot
Minimum setup example
- Trigger period = 250 - hit APPLY (below AutoExp frame ahead)
- Compression quality = 96 - edit or use +/-, the value is applied on change
- Start recording
Start
- Record-button to start recording
Stop
- Stop-button for stop.
Troubleshooting
Error 5 (frame buffer overflow)
- Frame buffer overflow counter ( = dropped frames).
- Possible causes:
- Not enough bandwidth - FPS and compression quality (combined) set too high: 5fps + 100%
- SSD write speed is slowed
- Errors are displayed as err5(N) against each buffer, where N is a cumulative number of errors
