Elphel workshop in Bordeaux during RMLL 2010
Contents
- 1 About RMLL
- 2 About the workshop
- 3 Dates, time and place
- 4 Overview of the camera building blocks
- 5 Elphel SDK
- 6 reflashing camera firmware & FPGA bitstream
- 7 Overview of the main software available on the camera
- 8 client software compatible with Elphel cameras
- 9 few words about network configuration for unicast and multicast modes
- 10 Post-processing
- 11 Interfacing with the camera, triggering, synchronization
- 12 multisensor examples with 10359 board
- 13 Publications
About RMLL
RMLL 2010 (Libre Software Meeting) is a free (as a beer and as a speech) and non commercial conferences, workshops and round table about Free Software and its applications. The LSM goal is to provide a platform for exchange among Free Software developers, users and stakeholders.
This year RMLL will take place in Bordeaux, France from 6th to 11th of July and is organised by a set of local Free Software user groups and organizations with the help of several public and private sponsors. The event will be hosted by ENSEIRB-MATMECA, U-Bordeaux 1, LaBRI & ENSCB.
About the workshop
The workshop was made during RMLL 2010 and was organized by our Swiss partner Alsenet SA.
All our European customers, partners and friends of Elphel are invited to participate in the workshop. It will be a perfect occasion to meet other Elphel customers, users & developers, to test the hardware, software and to discuss project ideas and future developments. RMLL is also an ideal place to get a better understanding of the economical models of Free Software.
Any question should be discussed on Elphel’s IRC channel, wiki or public mailing list so we can have a public log that is potentially useful to other Elphel users as well.
Dates, time and place
The workshop will take place on 7th July from 13:00 to 17:00 in the room TD14 of ENSEIRB.
For accomodation, map, and any other information please visit RMLL web site.
Overview of the camera building blocks
Elphel's goal is to provide high-quality, intelligent, network cameras based on open hardware and free software. Elphel hopes its modular camera design will attract software and FPGA engineers interested in exploring high-definition videography, among other innovative applications.
Both turnkey camera assemblies and OEM modules are available. All the documentation is published on this wiki and our mailing list under GNU FDL v1.3 license and all the source code including FPGA Verilog code, Linux drivers and software are available under GNU GPL v3 license.
boards
All the separate camera components are listed on this page.
Here are the most commonly used:
The 10338 & 10353 boards are the minimum requirements to assemble a camera:
- 10353 - processor board is the computer part of the Elphel 353 series cameras.
- 10338 - Aptina MT9P031/MT9P001 5MPix (2592x1944) sensor front end to Elphel 353 series cameras.
Those two are optional and very flexible extension boards:
- 10359 - multi-function board. It can be connected between the 10353 Processor board and a sensor one (up to three sensor boards can be connected)
- 10369 - IO extension board. SATA, CF, USB 1.1, GPIO, i2c, ... This board also have few adapters
On each of the board pages you will find links to circuit diagram, parts list, PCB layout & Gerber files. Some data-sheets and other necessary documentations are linked from.
assemblies
Our turnkey modules are listed here and are documented more in detail on Elphel camera parts.
price list
http://www3.elphel.com/price_list , last day of RMLL 2010 few cameras will be sold with a special 10% GPL contribution discount.
under development
Elphel is currently working on Eyesis high resolution panoramic camera - http://blogs.elphel.com/category/panoramic/
And soon we return to our next generation camera development - http://blogs.elphel.com/category/andrey/10373/
Elphel SDK
Elphel provide Free Software SDK for everything but synthesis/place&route tools for the FPGA, here you will have to deal with a proprietary but free of charge Xilinx WebPack ISE. Simulation is still possible with free software (this is what we use ourselves at Elphel) - Icarus Verilog and GTKWave. Unfortunately there are a few Xilinx primitives used in the design (from Xilinx unisims library) that are needed for the simulation. We hope that Xilinx will eventually release this code under free license, or somebody will help us to re-implement these simulation Verilog models.
To install the SDK for Elphel cameras you need a fresh installation of the latest supported (10.04 at the moment) (K)Ubuntu GNU/Linux distribution and follows instructions available on this page: Elphel Software Kit for Ubuntu, FPGA part is documented separately: FPGA Development in Elphel cameras.
Those manuals are written so that you should only copy & paste commands in a terminal in order to install the needed software needed to start developing on Elhpel cameras.
Elphel use KDevelop 3.5 IDE - there is a script that creates KDevelop project from Elphel source tree so you can easily navigate the files (for KDevelop 3.5x only, 4.x is not supported yet). But of course you are free to use vi or emacs...
If you are not able to install the SDK using those instruction, please report it on our mailing-list or here on the wiki in the discussion page.
reflashing camera firmware & FPGA bitstream
FPGA bitstream
FPGA is reflashed on every boot. The bitstream is placed in /etc folder.
The bitstream is sent to /dev/fpgaconfjtag (or other device) from /etc/init.d/fpga init script. Some configuration is done prior and after that. So the easiest way is to upload your bitstream by FTP or SCP, sync and reboot the camera.
Please read FPGA Development in Elphel cameras for more info.
Reflashing a working and accessible camera
If the camera run a working version of Elphel firmware and is accessible on the local network you should be able to flash the camera using the easy way.
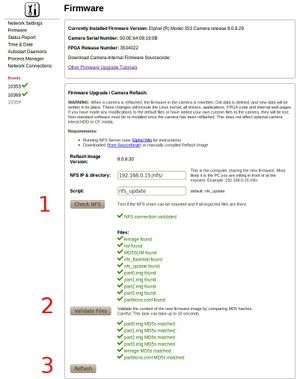
- "System Preferences" on the camera index have Firmware reflashing interface, You still have to configure an NFS server
- Reflash.php is a PHP script on the camera used by "System Preferences" web interface. You can also call it from your favorite browser including wget to automate reflashing process.
Reflashing inaccessible camera
Sometimes you may flash the camera with a non working experimental firmware, or simply corrupt your network configuration files.
In this case you can quickly check if IPsetd helps or try to connect via minicom on the debugging RS232 port available on 10369 IO board to repair your network config.
If nothing works, you still have a chance to see your camera working. Axis CPU have embedded network boot loader, so you can reflash the camera even if you have broken all the software.
- The easy way to do that low level reflashing is to use our live DVD, the procedure is detailed on 353 firmware upgrade procedure
- Prod353 was designed not only to reflash cameras but also to test the camera hardware
- And finally http://elphel.cvs.sourceforge.net/viewvc/elphel/elphel353-8.0/README.flash?view=markup&pathrev=MAIN explain how to do the procedure manually. You will need tools installed by Elphel Software Kit for Ubuntu.
Overview of the main software available on the camera
Imgsrv
Imgsrv was developed to increase the transfer rate of individual images acquired by the Elphel 353 series cameras. Imgsrv is connected through 8081 port and writes GET responses directly to the socket (reading image data from the circbuf using zero-copy memory mapping mmap), reaching 9-10MB/sec - virtually the full bandwidth of the network. This server does not provide any control over the sensor or FPGA compressor operation, its only purpose is to get data acquired to the (currently 19 MB) circular buffer in the system RAM. It is intended to have the functionality similar to the camera video streamers that also deal with the data already being acquired to the system buffer to be used when individual images are needed rather than the continuous video stream .
The imgsrv makes use of the new functionality of the /dev/circbuf driver providing it with a convenient web front end. It serves JPEG images (with Exif data attached) as well as metadata and circbuf status formatting output as the xml files.
astreamer
camogm
daemons
lighttpd / FastCGI / PHP
different PHP scripts
client software compatible with Elphel cameras
Browsers
Firefox 3.6
Automation
You can use command line tools such as wget or curl to automate many things on the camera.
For example on your PC you can use cron and wget to automatically download a full resolution snapshot once per minute. When we can use mencoder to assemble videos:
On the PC edit your cron:
crontab -e
you should add a line like
#.---------------- minute (0 - 59)
#|   .------------- hour (0 - 23)
#|   |   .---------- day of month (1 - 31)
#|   |   |   .------- month (1 - 12) OR jan,feb,mar,apr ...
#|   |   |   |  .----- day of week (0 - 7) (Sunday=0 or 7)  OR sun,mon,tue,wed,thu,fri,sat
#|   |   |   |  |
#*   *   *   *  *  command to be executed
* 6-21  *   *  *  wget http://192.168.0.9/snapfull.php -O ~/timelapse/`date +%s`.jpg  > /dev/null 2>&1
10  23  *   *  *  mencoder -ovc copy -mf fps=8:type=jpg 'mf://~/timelapse/*.jpg' -o ~/timelapse_videos/time_lapse_`date +%s`.avi  > /dev/null 2>&1; mv ~timelapse ~/timelapse_`date +%s` ;mkdir /home/polto/timelapse
This example get one image per second in full resolution from the camera from 6:00 to 21:59 and at 23:10 compress acquired images into a time-lapse video.
Video frameworks
Libraries
FFMPEG
lib livemedia (live555)
VLC, libvlc
VLC is a free and open source cross-platform multimedia player and framework, that plays most multimedias files, medias and streaming protocols.
It is simple to use, yet very powerful and extendable. Vlc page provide usage examples.
MPlayer / Mencoder
MPlayer focuses on low latency displaying by avoiding caching and is therefore perfectly suited to display live video streams from Elphel cameras.
Another great feature of MPlayer is the wide range of supported output drivers. It works with X11, Xv, DGA, OpenGL, SVGAlib, fbdev, AAlib, DirectFB, but you can use GGI, SDL (and this way all their drivers), VESA (on every VESA compatible card, even without X11!) and some low level card-specific drivers (for Matrox, 3Dfx and ATI), too! Most of them support software or hardware scaling.
GStreamer
few words about network configuration for unicast and multicast modes
Post-processing
imageJ plugins for Elphel
JP46 post-processing workflow
There are currently 2 applications and a demo script for post processing JP46 quicktime movies: http://elphel.svn.sourceforge.net/viewvc/elphel/tools/
Movie2DNG is developed by Paulo Henrique Silva and can currently (May 2010) not to the full transition from *.mov to dng but uses ffmpeg to extract a jp46 sequence from the mov. This is the first step in the process.
Once there is a image sequence of JP46 (jpeg) files you can use the next application called "JP4toDNGconverter". This tool uses a modified libtiff to write DNG files that can then be opened the same way as RAW files from other cameras in UFRaw, RawStudio, or Adobe Aftereffects, etc.
The BatchProcess PHP script basically combines the above 2 applications and does a batch conversions of all quicktime movs found in a particular folder to a DNG sequence.
Gstreamer plugins for Elphel
using Gstreamer and GLSL with Elphel cameras
working with OpenCV
using OpenCV and GpuCV with Elphel cameras
Interfacing with the camera, triggering, synchronization
simple and stupid integration with Arduino
http://arduino.cc can be used to easily interface button, motion detector or any other external trigger to the camera.
In this example I wrote a code for Arduino to handle a button and a PIR motion detector. The Arduino is attached to camera's USB and send shell commands to the camera for execution. So PIR is binded to camogm to record on the internal CF card on motion detection and the button store a full resolution snapshot.
Trigger internal & external, multiple cameras synchronization, trigger a camera from GPS
Triggered mode can be used to achieve precise locked FPS, to synchronize multiple cameras or to trigger them from an external device.
About triggered mode
Triggered mode is documented here. During your experimentations please do not forget that our CMOS sensor is ERS (Electronic Rolling Shutter).
We have hardware synchronization capability allowing 1μs jitter between images as well as external trigger.
The NC353L camera have FPGA code allowing the camera synchronization, but an additional board is needed. The first board allowing the use of hardware synchronization commercialized by Elphel is the 10369 IO extension board. The board have internal synchronization connectors for cameras mounted in the same camera case and wired internally and an external modular RJ-14 opto-isolated connector.
You can have several cameras in a so called "slave" mode waiting to receive the trigger and one camera (or any other device) serving as master. To trigger the image from all cameras the "master" device need to send a 3-5v impulse on the synchronization cable.
The 10369 boards have two individual sets of I/Os for the synchronization of several cameras:
1. Small 4-pin flex cable connectors to interconnect multiple camera boards in a common enclosure
2. Modular RJ-14 4-pin connectors for synchronizing multiple individual cameras
Each of the two channels has bi-directional opto-isolated I/O's and a non-isolated high current driver that can trigger multiple cameras. The FPGA code includes a programmable generator that can control the synchronization output drivers, and a programmable input delay generator driven by the selected opto-isolated inputs so each sensor can be triggered with a specified delay from the common for-multiple-cameras trigger. There is also circuitry to drive sensor trigger input.
The same FPGA module can be used in a single camera configuration to provide precise control over the frame rate. The period of the free running sensor is defined as a product of the number of lines by the number of pixels in a line (including invisible margins) by a pixel period, so there are some restrictions on the period that can be programmed. This triggered mode of sensor operation also simplifies alternating the exposure time between consecutive frames. In a free-running ERS mode, exposure overlaps between frames and it is not possible to control it independently for each frame.
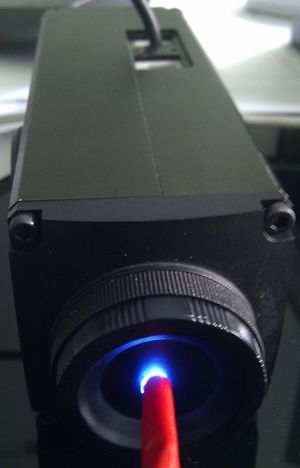
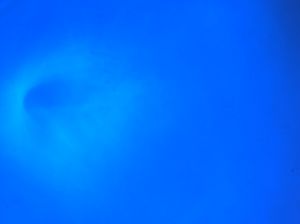
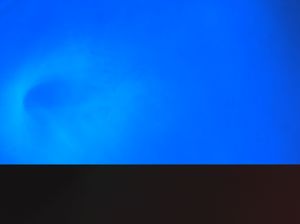
Playing with a LED (or a flash lamp)
Here are some examples with a camera in triggered mode. The camera is filming at Full resolution at 1FPS.
Deep hardware / software integration with Elphel: example on likoboard and likomapper software
About Likoboard and Likomapper projects
Likoboard is a re-programmable microprocessor conceived to create a human – machine interface. Originally likoboard was co-developed by Alsenet SA for an exclusive piece of high-end jewelery by the Maison Olfact. Being entirely based on Libre technologies Likobord can be integrated as an autonomous remote control to an application, as well as a peripheral USB of an embedded system or of a personal computer.
Likomapper project was initiated by Phil and implemented by Alsenet SA. It's goal is to map likoboard's tactile interface to control exposure on the camera.
Likoboard is connected to the camera via USB, the camera runs a PHP software as daemon to communicate with likoboard over HID and set the exposure time using Elphel PHP extension.
Cross-compiling the libs
liblikoboard depends on libhid, and libhid needs libusb legacy.
I did compile the latest libusb legacy (0.1.12) from sourceforge, and libhid-svn (rev. 364) from http://libhid.alioth.debian.org/
See here for the cross-compiling method
Porting the PHP extension
To port the PHP extension php_likoboard I had to:
- Build it for my native cpu,
- Source init_env from the elphel353/ folder.
- Copy the php_likoboard folder to elphel353/apps/php/ext/php_likoboard.
- Change to this folder and run ../../elphize.
- Run make and copy .libs/php_likoboard.so to /usr/local/crisv32/lib/php/extensions/no-debug-non-zts-20060613/.
Debugging
php_likoboard was not working on the camera. So I did write a test application sending debugging messages in console to see what was going wrong.
libusb-0.1.12 appears to be broken when running on the camera, so I did restart using libusb-0.1.11 and it worked.
Adding a PHP ELPHEL_DAEMON to the firmware
Integration to Elphel CVS
multisensor examples with 10359 board
- A while ago (somewhere at 8.0.8.xx) the commands addresses were changed - so please check 10359 discussion page
- Andrey added extra parameters and now everything can be controlled from parsedit.php
- Following this link might be helpful for changing the camera parameters.
- There are many other parameters, selection of the sequence and switching between single/multi mode is included in camvc (controls are shown when the 10359 board is detected in the system)
Switching channels
| Parameter | Default value | Equal to 10359 reg | Comments |
| MULTI_SEQUENCE | 0x39 | 0x806 | 2 LSBs - Direct Channel bits - 0x1 - J2, 0x2 - J3, 0x3 - J4 |
Combined frame mode
1. set other image parameters
2. set TRIG parameter to 0x4
3. set MULTI_MODE parameter to 0x1
